
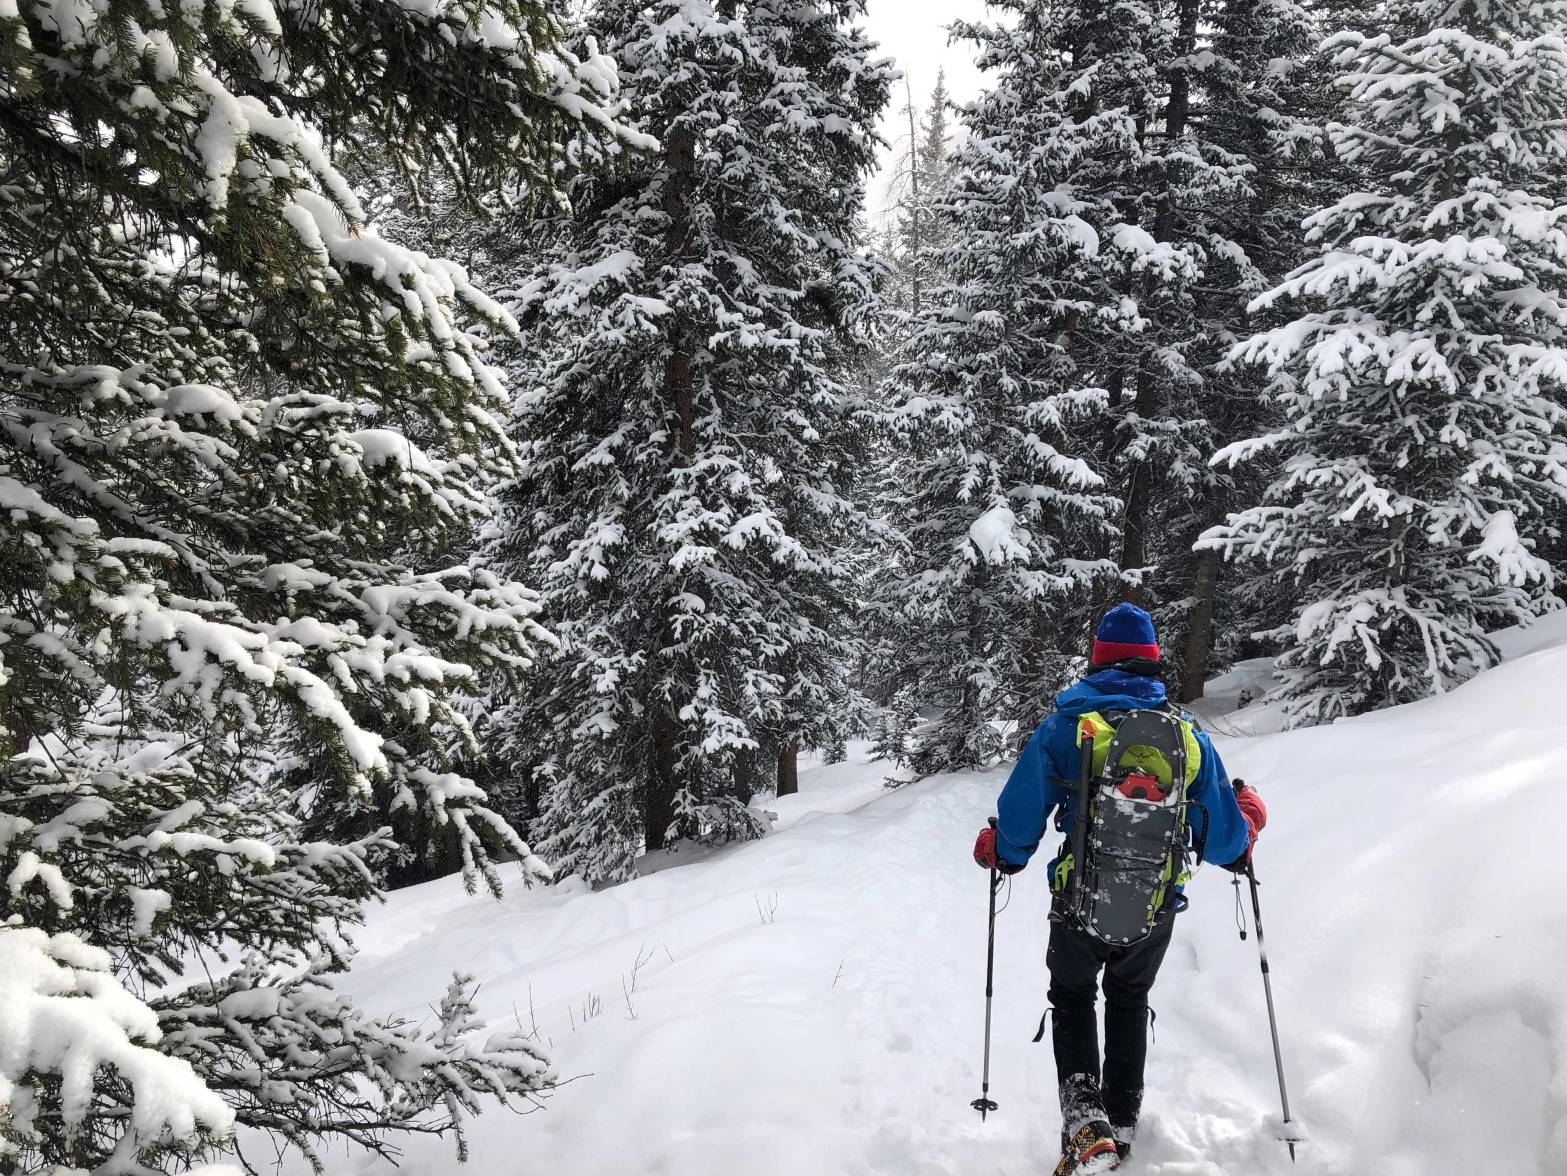
Let’s not sugarcoat it. Snowshoeing can be a pleasurable pastime when the powder isn’t that deep or you’re following an established track. (Which, ironically, often means flotation isn’t even necessary.) When snowshoes are actually needed, it would be difficult to describe one’s relationship with the four-pound torture devices as anything less than abusive.
Breaking trail in untracked snow is about as enjoyable as slamming your hand in a car door, except you repeat it a few thousand times over a multi-hour outing. It’s tiring. It’s awkward. Your hip flexors hate you. You look like a big nerd. If you want to venture anywhere other than the most popular trails in winter, however, mountaineering snowshoes are a necessary evil.
Luckily for us, gear designers seem to understand how much snowshoeing sucks. Manufacturers in recent years have made incredible advancements in flotation technology. Nowadays, it’s more like just crushing your pinky instead of your entire hand. The negative effect is that the market has become saturated with dozens of different offerings, and it’s difficult for the uninitiated to understand what to purchase.
For the purposes of this guide, I’ve refrained from mentioning other less conniption-inducing flotation options. I doubt you’ll find anyone arguing that a backcountry ski setup isn’t worlds better than even the most advanced snowshoes, but skis require additional skill and at least six times the entry-level investment. Mountaineering snowshoes are also more versatile on steep, rocky alpine terrain. If you have $200, a pair of sturdy legs and an ample supply of self-loathing, they’ll take you anywhere you want to go.
Here are the factors to consider if you’re in the market for a new pair of mountaineering snowshoes:
Cost
Sorry to be the bearer of bad news, but you can’t skimp on price. Sure, you can get a great deal at Costco or Walmart or wherever, but those models will break at the first opportunity and provide a maximum misery factor: insecure bindings, poor traction, heavy weight. Plan to spend $200-300 for a pair from an established name brand. Not only will you appreciate the enhanced features, they’ll also last a decade or more.
Traction
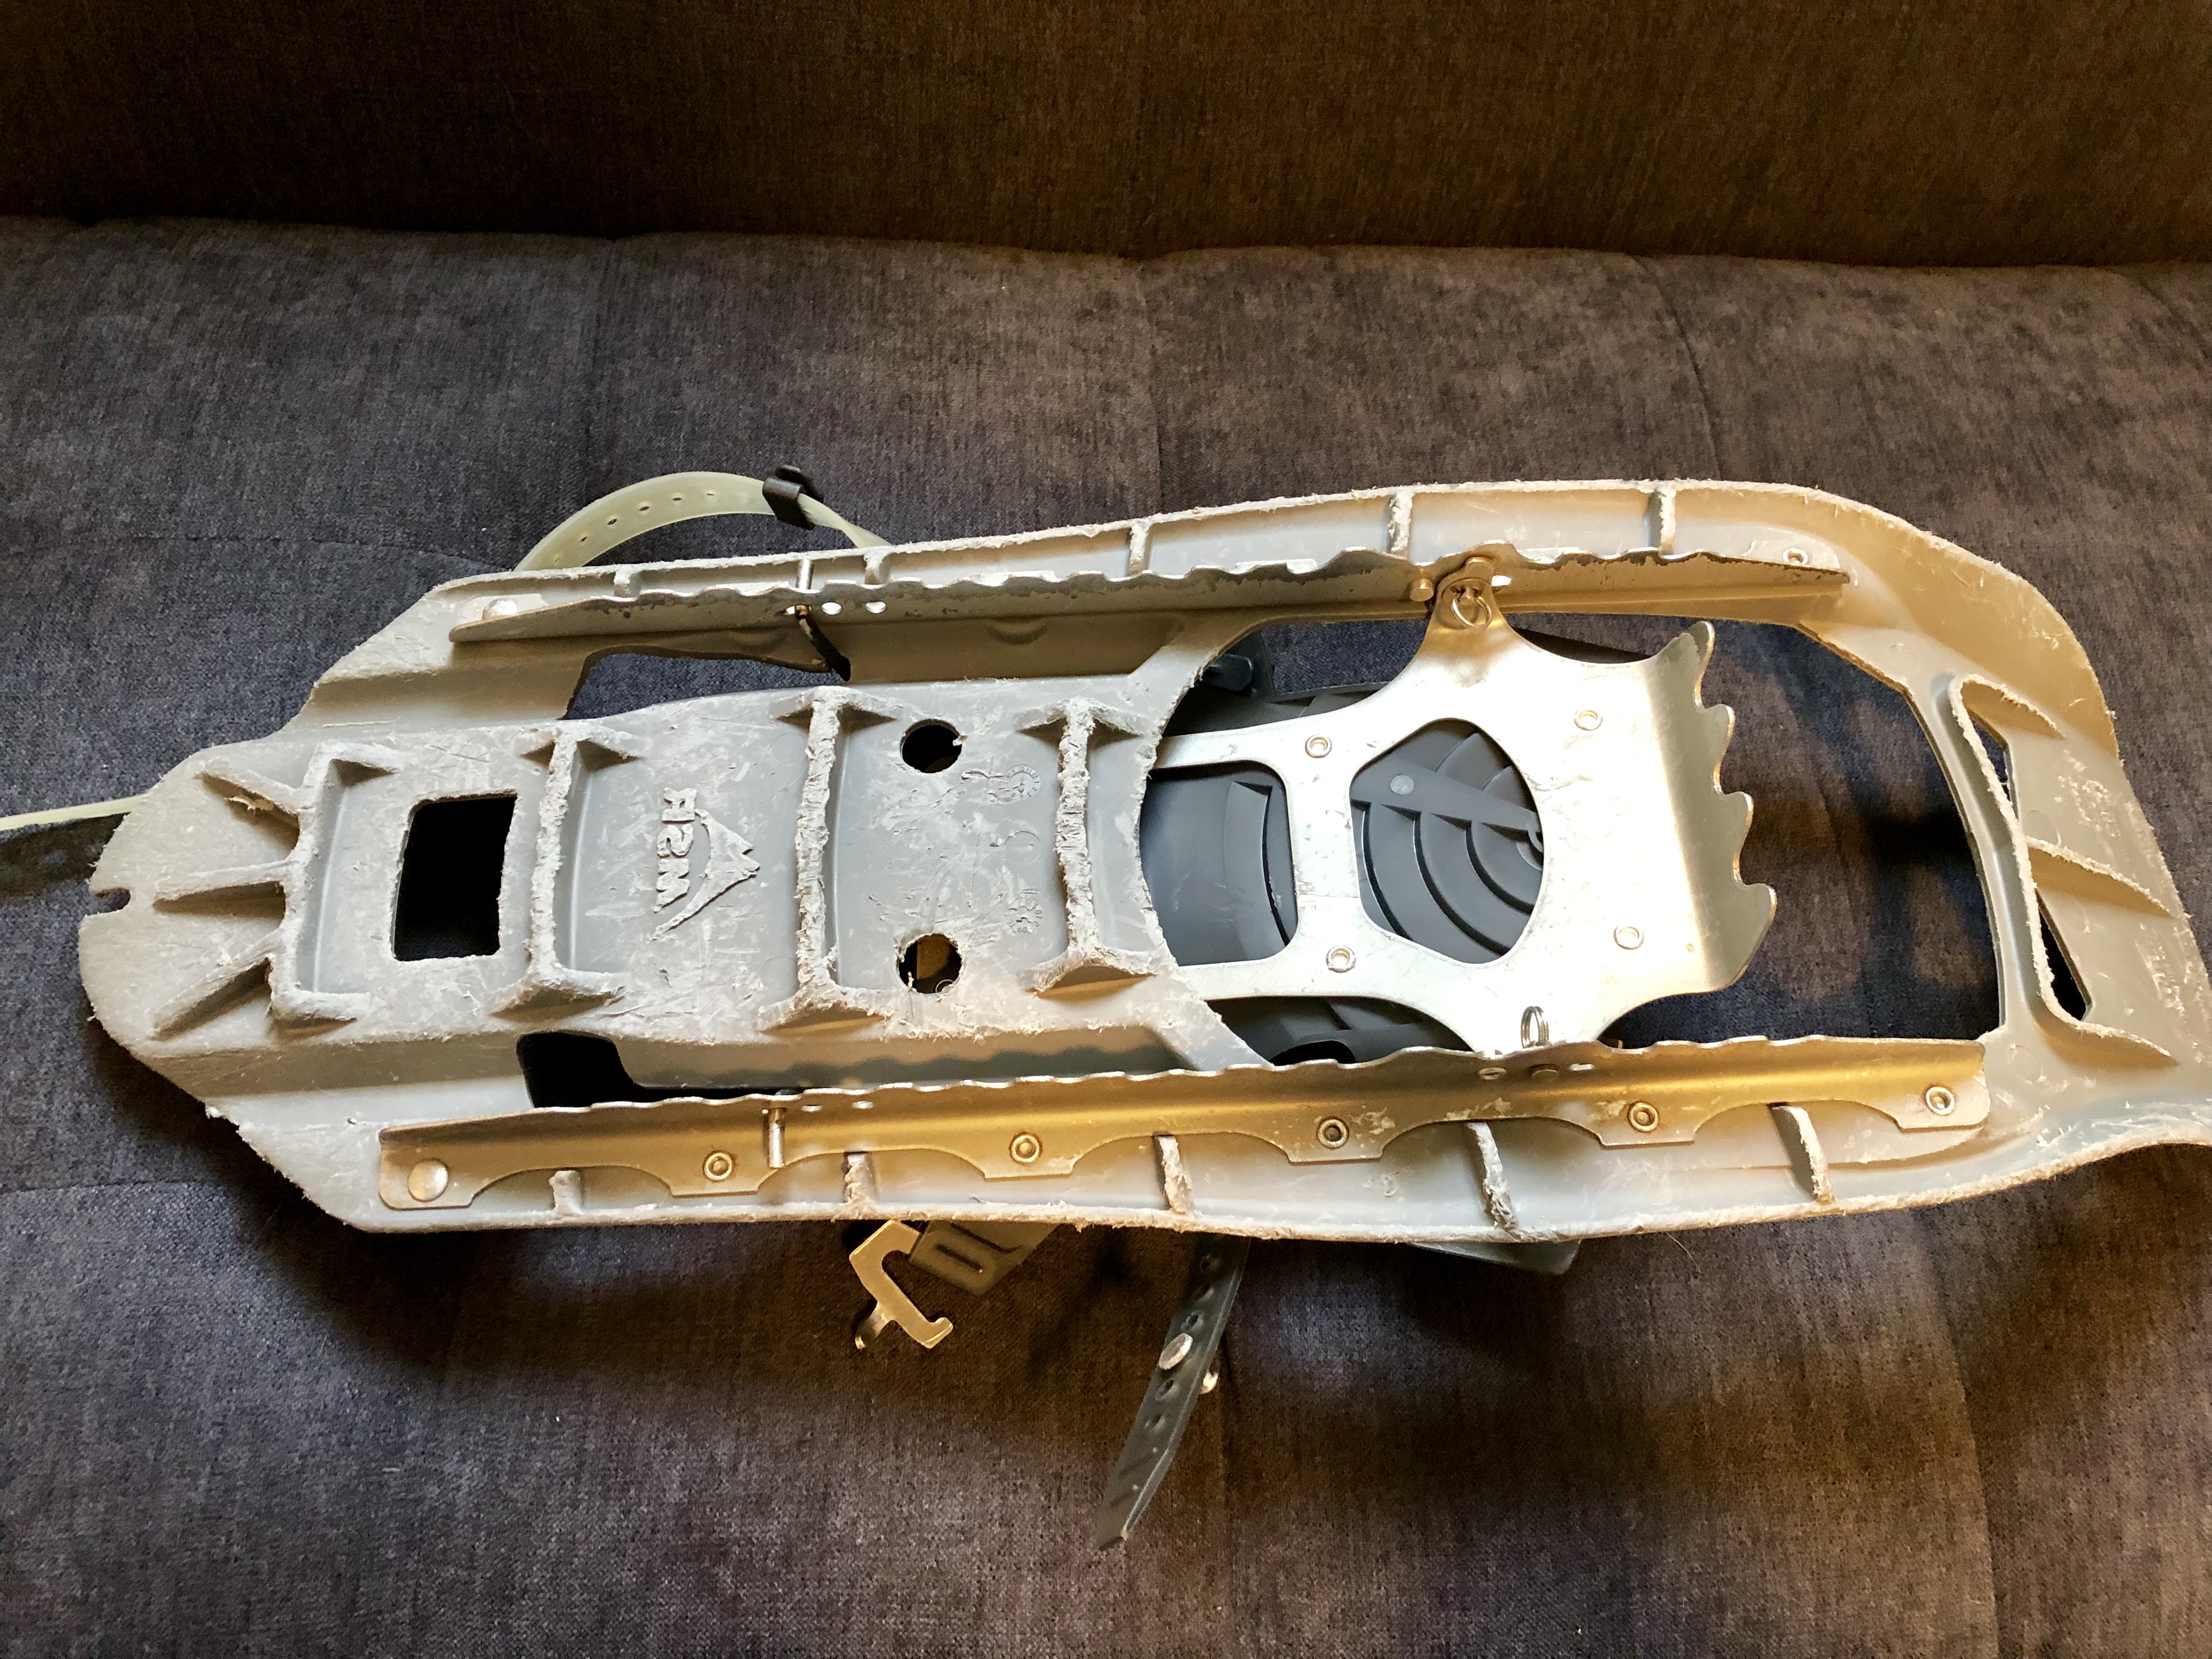
Buy a pair with steel crampons, for durability and traction on both snow and ice. They should also have teeth running along the side edges for stability on uneven terrain. This is perhaps the most crucial feature of a mountaineering snowshoe. If your footing slips even a little, especially on steep slopes, you’re going to have a bad time. An added bonus is that snowshoes with aggressive traction can be used fluidly on slopes up to about 30 degrees, without the hassle of stopping to swap into traditional crampons or MICROspikes.
Length
This will depend entirely on your stature. If you’re a heavier person, you’ll need bigger snowshoes to stay afloat. That said, for longer days and vertical ascents, gear weight is at a premium. The MSR Evo line is fantastic in that you can get a shorter snowshoe — 22-25 inches — with removable 6-inch tails for deep powder days. I’m a 6’0” and 185-pound adult male, and I’ve never once regretted owning 22-inch snowshoes. Consider also that these loathful beasts will spend a significant amount of time riding on your back as you’re traversing dry, wind-swept or hard-packed terrain. The 30+ inch varieties might as well be five-pound windsails, if they fit on your pack at all.
Heel Lift

Snowshoeing is hard. Snowshoeing on high-angle terrain is harder. The idea behind a heel lift is to remove some of the awkward strain on your calves, and it’s far from just a novelty. Used appropriately, a heel lift can turn a steep straight-up sufferfest into a relative pleasure cruise. It basically cuts the required work of snowshoeing uphill in half. Plenty of great snowshoes exist without heel lifts, but if you plan to regularly do more than 1,000 feet of vertical, spring for a pair with this amazing and underrated feature.
Bindings
The snowshoes, obviously, have to stay on your feet. You should be able to comfortably wear them for hours without any slippage, including on steep and uneven ground. You’ll also be putting them on and taking them off all the freakin’ time, so make sure you can easily manipulate the straps. You should be able secure or remove a pair in 30-60 seconds, while wearing gloves. Each company has a different take on bindings. Play around with what works for you and your winter boots. Flexible straps that lay flat are a nice bonus for when you have to carry your snowshoes on your pack.
Durability
You can’t go wrong with higher-end models from any the major brands carried at dedicated gear shops. Look for an aluminum or plastic frame to ensure the snowshoes don’t shatter the first time you fall through trap-door snow and make friends with a rock. I’ve spent eight years abusing my MSR Evo Tours, which are pictured above and sadly discontinued. They’re showing no signs of wearing out despite frequent encounters with rocks, dirt and pavement.

I have owned several different models including Atlas 12s and MSR Lightning Ascents. I find the Lightning Ascents are awesome with the low weight and traction but absolutely HATE the binding straps. They are unacceptably difficult and am disappointed that MSR won’t change. The binding method on the Atlas 12’s is simply phenomenal. Tightens with one pull of a strap and releases with a single pull on a separate piece. All can easily be done with mittens on. Now if we could only get MSR to adopt the same easier method then I think they would have the best all around snowshoe.
LikeLiked by 1 person
Agree, and it’s hard to find the sweet spot for them. Too loose and they fall off. Too tight and they hurt your foot.
LikeLike